It's easy to get so involved with your subject that you don't pay much attention to the background or surrounding space. The background and surrounding space around your subject is every bit as important as the subject, and there are several ways to control how the background appears and how it affects the image.
Backgrounds
1: Depth Of Field
One powerful method of controlling the appearance of the background is controlling how sharp it appears in the image. As we’ve discussed earlier, the aperture setting controls the “depth of field”, or how much appears sharp in a photograph. Let’s take a closer look at exactly what “depth of field” is.
When a camera’s lens is focused, there is a single, thin plane of absolute focus, so when you focus your camera on a subject, you’re actually focusing on a single plane. But not all subjects are flat, right? There is an area in front of and behind that plane of absolute focus which also appears sharp. This area is called “depth of field”, and can be roughly divided into thirds - one third in front of the focused distance, and two thirds behind it (a bit more on that in a moment).
The primary control a photographer has over the depth of field is the aperture setting of the lens. For the most part, the smaller the aperture setting, the more depth of field - but there are a few things to consider as well, such as distance from the subject and lens’ focal length. There are five things to keep in mind when considering depth of field:
1: With any given lens, the smaller the aperture, the greater the depth of field
As you “stop-down” any lens (select a smaller aperture), the depth of field will increase.
2: From any given location, the longer the lens, the shallower the depth of field
If you photograph a subject with a 50mm lens, then switch to a 200mm lens and photograph the same subject from the same spot, the 200mm lens will yield less depth of field.
3: With any given lens used at any given aperture, the closer the focusing distance, the shallower the depth of field
If you focus on a subject 50 feet away, the depth of field can be measured in feet, but if you’re shooting something 5 inches away, the depth of field becomes mere inches.
4: With any given subject magnification, all lenses set at any given aperture will yield the same depth of field
Although this may not be immediately apparent in the final images when compared side by side, a closer look will prove it. Longer lenses incorporate a smaller amount of the background, so this smaller area may look more blurry when compared to the same image taken with a wider lens, but if you look at the same background area of the wider lens photo, you’ll notice that it is just as out of focus (or sharp) as the same area covered by the longer lens.
5: The aperture marked on your lens may not be the aperture you’re actually shooting with
Many lenses, zoom lenses in particular, will “shift” the aperture as you zoom. For example, there are many 70mm-210mm lenses that, when set at f8, are shooting at f8 at 70mm, but they’re shooting at f11 when you zoom the lens out to 200mm. So, when zoomed to 200mm, you’re actually shooting at an aperture setting of f11, and you’re getting the equivalent depth of field of f11, regardless of what the aperture ring on the outside of the lens indicates. Most modern cameras with internal aperture displays will automatically adjust for this and display the “updated” aperture. Another case where this is common is with close-up work. When you focus a lens closer, there is a space added between the lens’ elements and the camera body. This space is known as “extension”, and the more extension you add, the more light lost. For example, if I have a 50mm lens, and I place 50mm of extension between that lens and the camera body, I’m focusing very close (life-size on the negative!), but I’m also losing 2 stops of light, so if I have my lens set at f11, I’m actually shooting at f22, but I’m getting the additional depth of field of f22 (which I’m going to need because I’ve gotten so close to my subject - see point #3 above.)
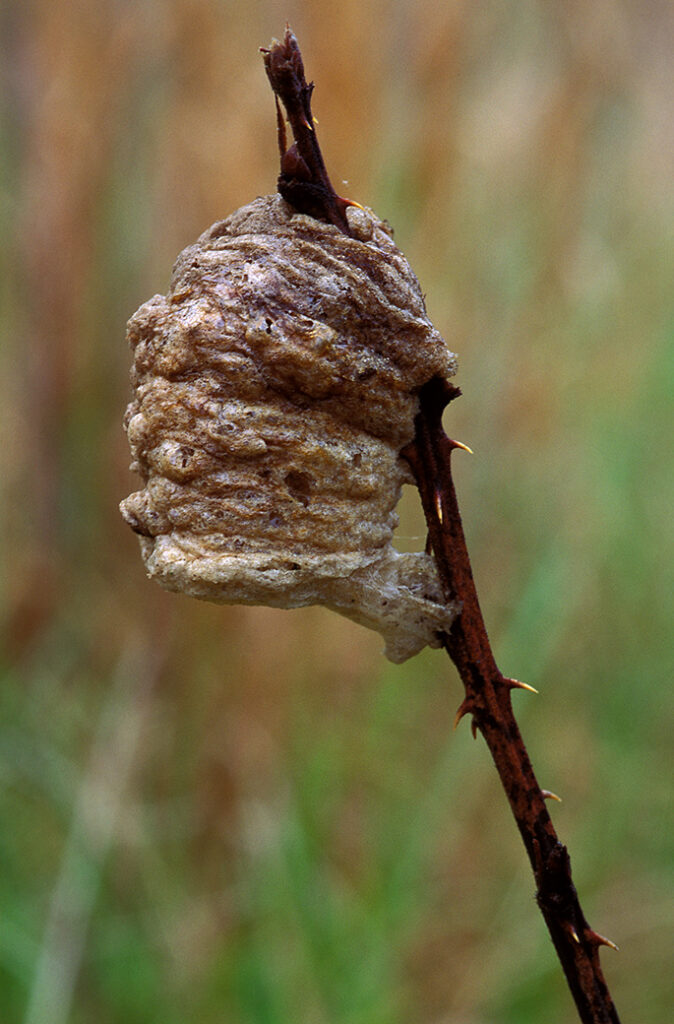
This image was shot at an aperture setting of f16. The background is blurry, but there is still enough detail to make it distracting.
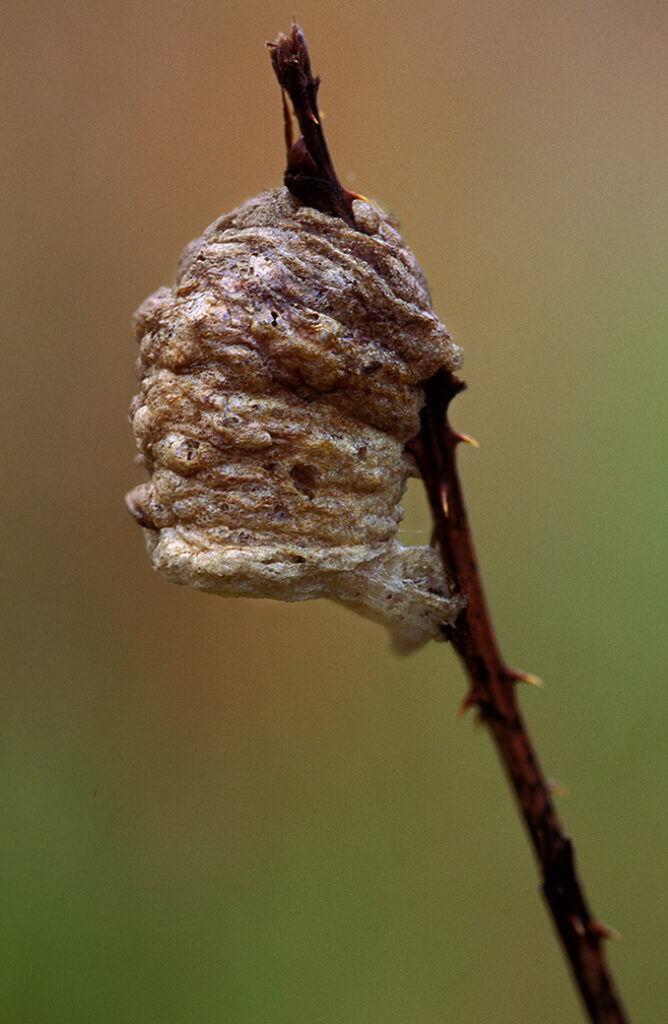
This is the same image shot with an aperture setting of f5.6. Now the background is a muted blur and does not compete for attention.
Getting Maximum Depth of Field
We discussed earlier how the depth of field can be divided roughly into thirds - one third in front of the focused distance, and two thirds behind, but where would that knowledge come in handy? Let’s say that you want to take a scenic shot of a mountain range, and you want to include the flowering plant that’s a few feet away in the composition. You know you need an aperture that will give you as much depth of field as possible - but do you focus on the mountains or on the plant? If you focus on the plant, you won’t get enough depth of field to render the mountains sharply, and if you focus on the mountains, your plant will be blurry, but consider this: if you’ve focused on the mountains, probably the “infinity” focus setting of the lens, and you know that two thirds of your depth of field falls behind you subject, what’s beyond infinity? Nothing, so you want to focus the lens at a distance where “infinity” is the rear limit of the depth of field, which will also give the most depth of field possible in front of that distance. This is the “hyperfocal distance”, the focused distance that will yield maximum depth of field for an image such as that. How, you may ask, do you determine what the “hyperfocal distance” is? There are three ways:
1: If you’re lucky, your lens will have depth of field marks on the focusing barrel which display what your depth of field will be for any focused distance at any aperture. If you’re fortunate enough to have such a lens, then focus on your background image that you want to be sharp and take note of that focused distance, then adjust the focus so that the focused distance of that background falls at the depth of field mark on the lens. Many camera manufacturers are no longer incorporating depth of field marks on their lenses, so don’t be discouraged if your lens doesn’t have them.
2: Many cameras (primarily the higher prices models) have a depth of field preview button. If you’re using an SLR camera, when you look through it, the lens’ aperture is wide open to allow the brightest image to view - the lens does not stop down to its shooting aperture until you actually take the picture. Many cameras have a depth of field preview button which stops the lens down to the shooting aperture before you take the picture, allowing you to actually see how much will be in focus. The image gets darker (especially when using smaller apertures), but the depth of field can be previewed. With the depth of field preview button depressed, refocus you image until the background subject appears in focus.
3: If your camera lacks both the depth of field marks on the lens and a depth of field preview button, the best bet is to focus the lens one third into the scene, one third the distance between your foreground subject and your background subject, and select the smallest aperture that the existing lighting allows. This will result in the maximum depth of field possible for that situation.
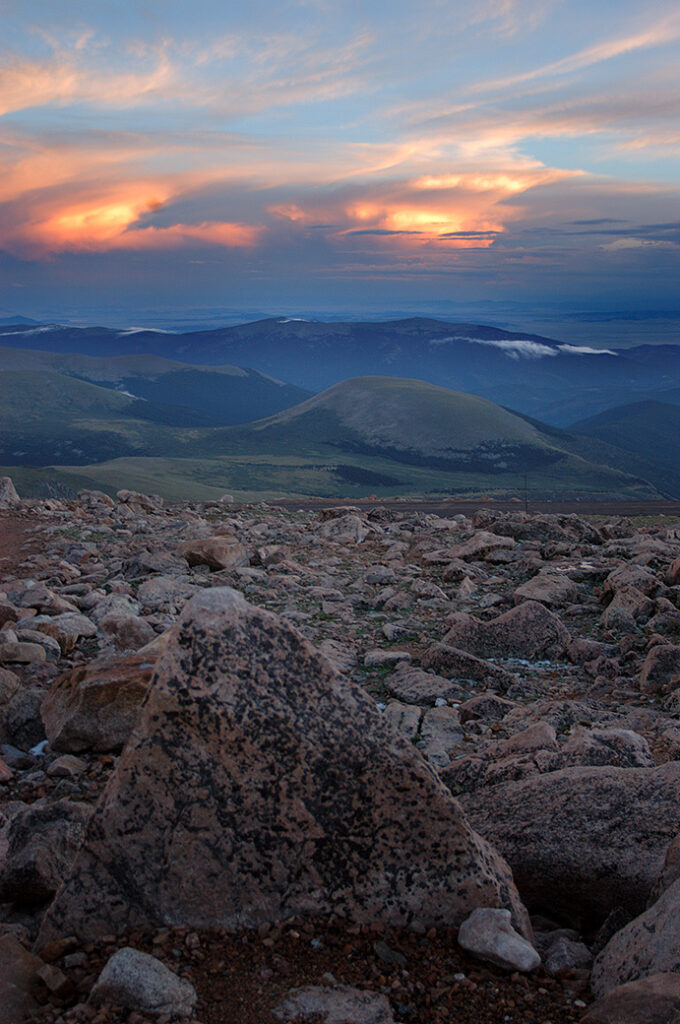
By focusing 1/3 into this scene and using a small aperture, the rock in the foreground and the clouds on the horizon all appear sharp.

Another example of maximizing depth of field.
2: Select The Background
Controlling the depth of field is one way to alter the appearance of the background, but in many cases, a slight shift can supply a completely different background producing an entirely different image. This is especially true when using long lenses, where the field of view is more narrow.
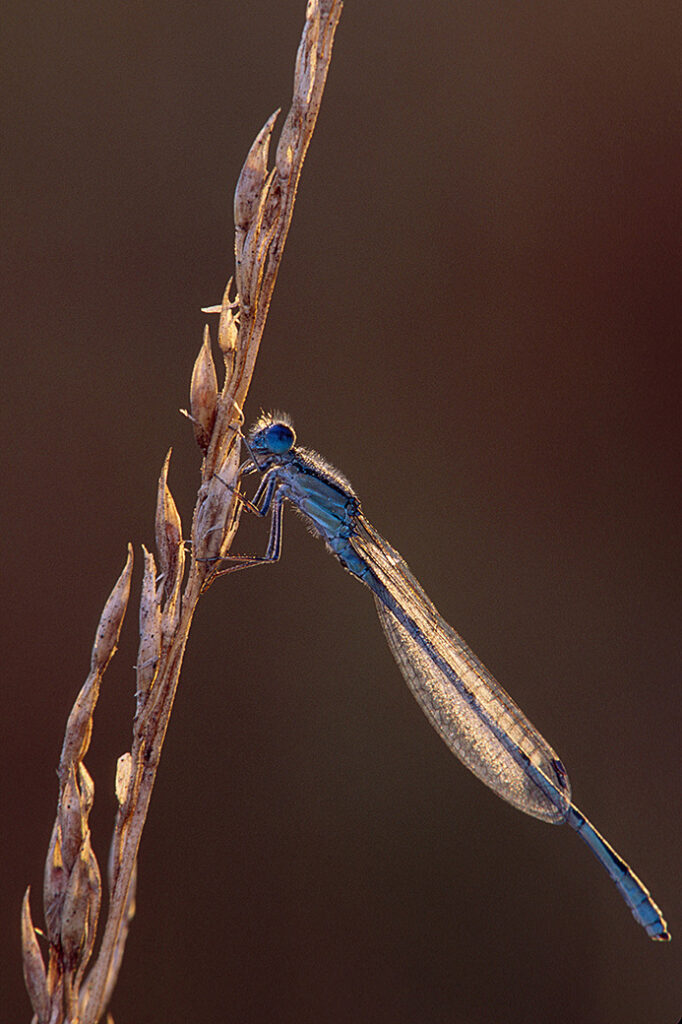
This dragonfly stands out pretty well against the dark, muted background.

A slight shift to include a glare from a pond creates an entirely different image with a completely different feel.
Simply blurring or muting the background does not guarantee that your subject will stand out against it. Blurring the background doesn't alter its tonality - a darker subject will stand out against a lighter background, and a lighter subject stands out against a darker background. The slight difference between, for example, a tree branch with strong sun hitting the leaves and the dark trunk of the same tree, can make a world of difference in the final image. If shifting to alter the background is not an option, consider modifying the background you're forced to use by using a reflector to pour some more light onto it, or using something to throw a shadow onto it.
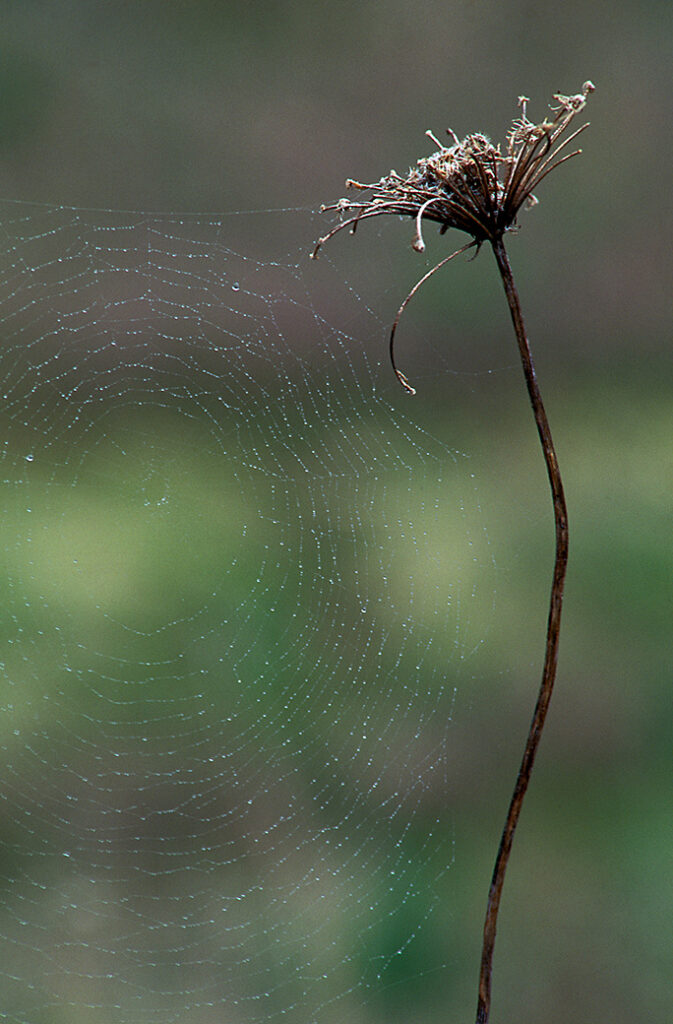
This spiderweb is barely visible against the bright background...
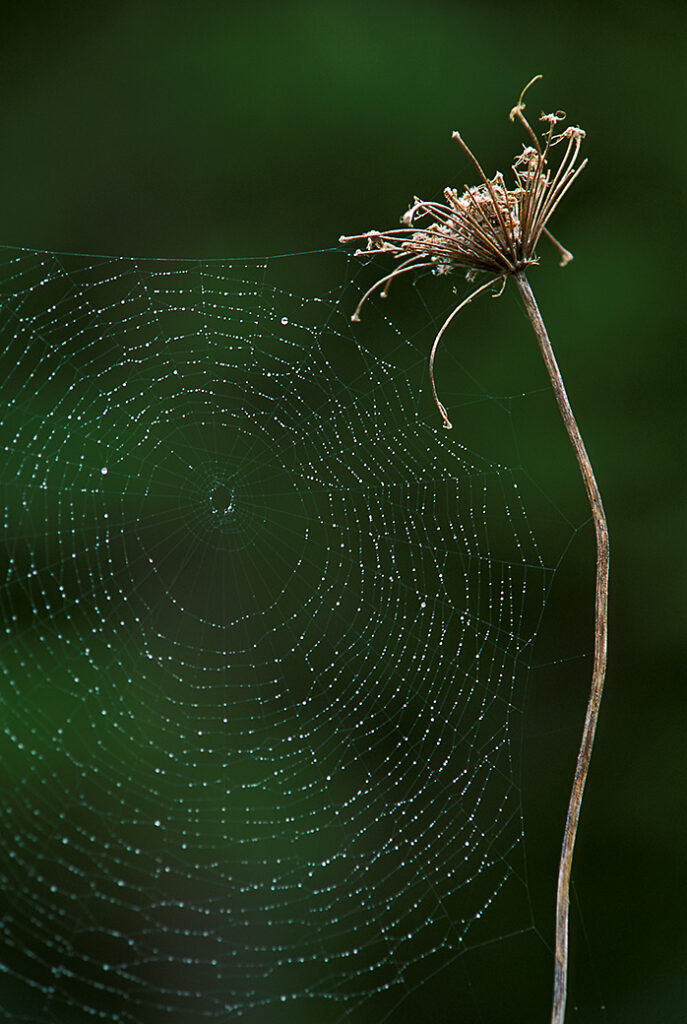
...but a slight shift placing the web against a darker background makes it stand out much better.
Surrounding Areas
4: Selective Gardening
Sometimes it's just a matter of cleaning up the background and/or surrounding area of the subject. Keep in mind that the photograph reaches out to every corner, and anything that's within those corners becomes part of the photograph. Whenever possible, remove anything that distracts from the message you want your image to convey.
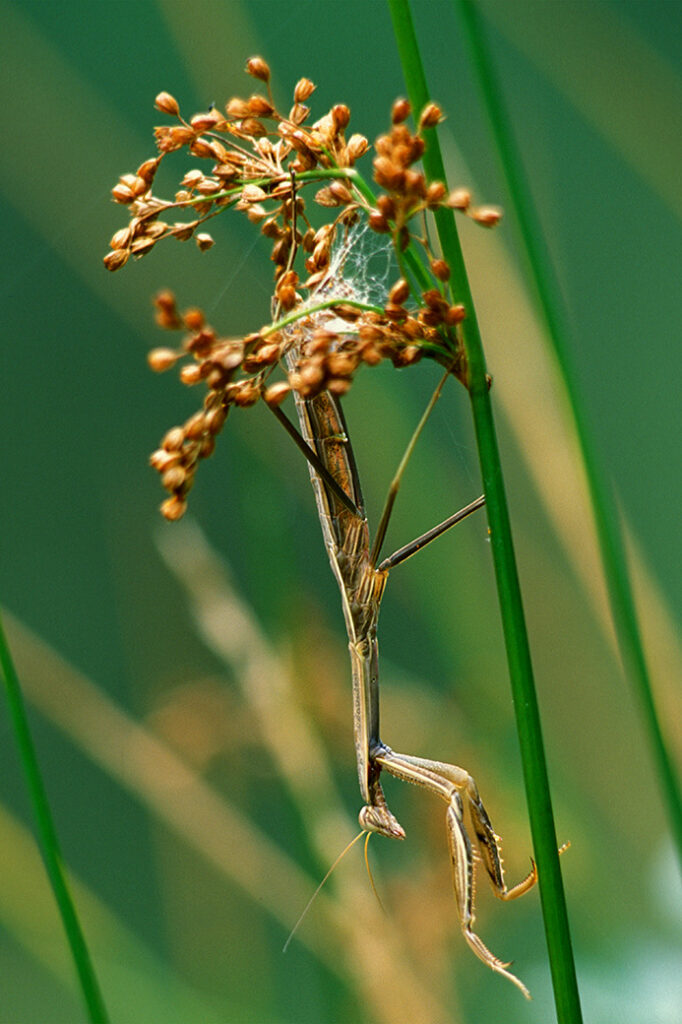
The background in this image is cluttered and busy, arguing with the subject for attention.
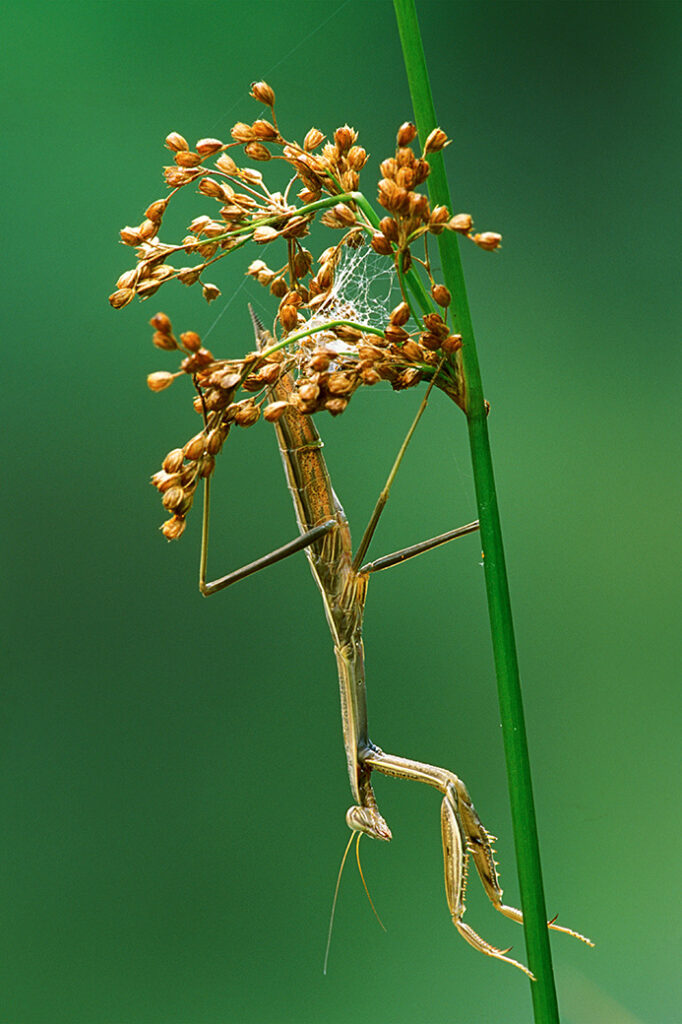
Some simple selective gardening, removing the dead reeds and branches from the background, creates a cleaner image allowing the subject to stand out.