10: Follow The Light

posted in: Photography 101 0

"Photography" literally translates to "painting with light" - without light, there is no photography. Being aware of the lighting quality of your images, and manipulating it at times, can turn a snapshot into a beautiful photograph.


1: Never Between 10 and 2
There is an old "rule" that recommends not to shoot between the hours of 10:00 in the morning and 2:00 in the afternoon. The reasoning for this is that lighting between these hours tends to be pretty much directly overhead, creating a flat appearance to the scene. Earlier or later times of the day provides lighting that produces more dramatic shadows and accentuates detail for many subjects. While I don't believe that any photographer simply refuses to shoot during these hours - landscapes, in particular, will look much more interesting when shot at earlier or later hours.

2: Plan For It - Wait For It
Particularly with landscape photography, you're at the mercy of natural light illuminating your scene - but your scene may look different every time you visit it. That's because the lighting of your scene changes with time and weather - and some of these qualities are predictable and can be planned for. For example, if you want to get a photograph of a particular cliff, and you know that the cliff faces west - it will most likely be in the shade in the morning, and well lit in the afternoon. There are times that cannot be predicted as easily - during storms, for example. Sometimes you just get lucky, but keeping the lighting quality in mind while shooting will produce better photographs. Produce you own luck!


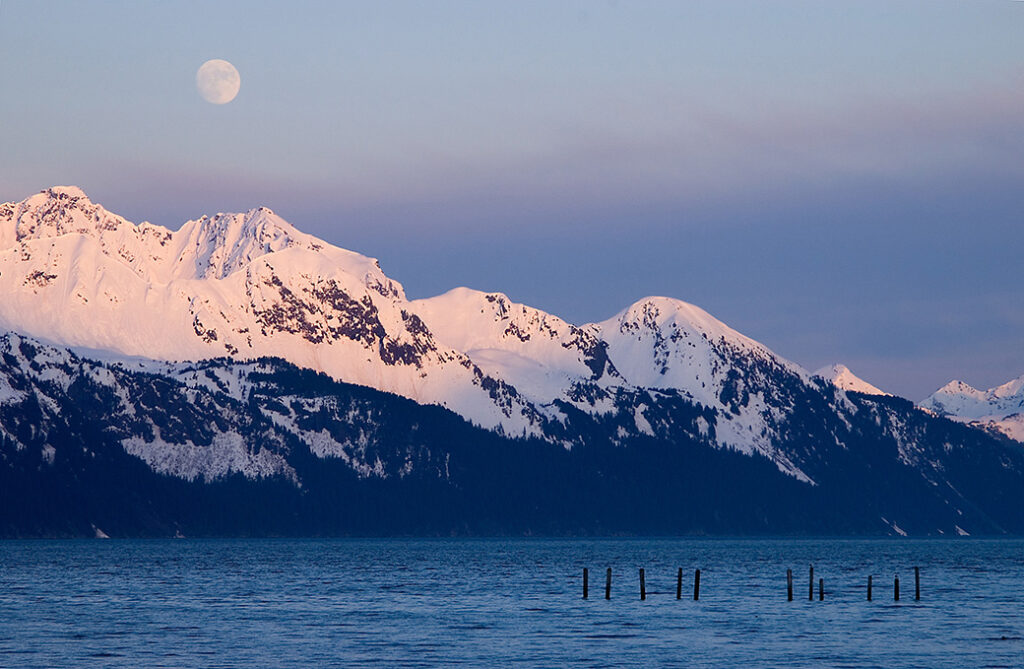
Waiting until early evening to shoot this image, I was able to get some of the color of the sunlight as it was filtered through the atmosphere on the snow covered mountains. I knew from the day before that the moon would be coming up over the mountains a bit later than the previous day, closer to sunset time.

Types Of Lighting

There are entire books and courses on lighting and lighting manipulation. What is listed below is an extremely basic description of various lighting found primarily in natural habitats:

3: Front Lighting
For the most part, this refers to a light source coming over the shoulder of the photographer, illuminating the front of the subject. While it would seem to be the "best" lighting for most subjects, front lighting can actually hide detail because there are fewer shadows to illustrate subject detail, and if the lighting is too bright, it can wash out colors. Front lighting that is lower, particularly sunlight, tends to be a bit warmer and not quite as harsh.


Late afternoon with the sun over my shoulder supplied a nice, warm light on these rocks at Red Rock Canyon, NV.


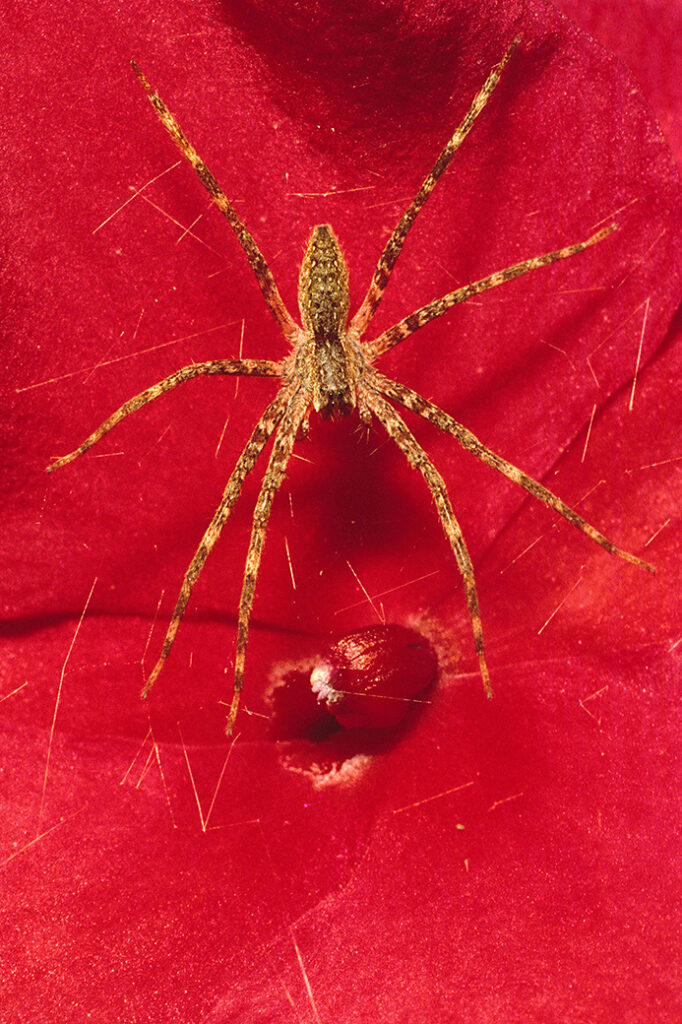
This Grass Spider camped out on a red Impatiens flower was illuminated with a soft, front natural light.

4: Side Lighting
As the name implies, this refers to light sources that are coming from the side of the subject. Side light creates drama by accentuating shadows and detail, but can complicate exposure calculations in order to keep detail in the highlights and shadows.

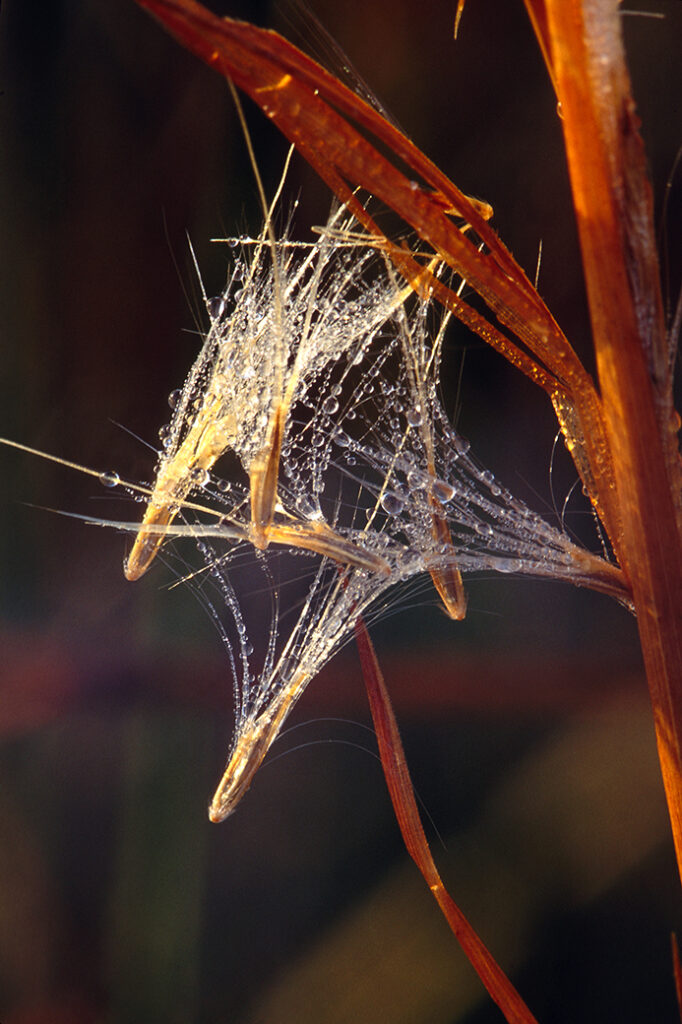
Light coming from the side of these grass seeds amplifies the textures and brings out some detail in the water droplets.

The soft side lighting of this Preying Mantis egg case emphasizes the texture and shape of the subject.

5: Back Lighting
This refers to a light source that is located behind the subject and create a powerful image. If your subject is translucent, such as a flower, back lighting can bring out details and textures that are nearly invisible with any other type of light. Back lighting can also create interesting silhouettes when the subject is solid. The tricky part about back lighting is exposure - base your exposure on what you want to appear to be medium in the final image, for example, metering off of a section of the sky when taking a photograph to silhouette a lighthouse against a colorful sunset.

This is a back lighting situation where a reflection of the light source is actually incorporated into the composition. The lighting creates a silhouette of the duck in the foreground.

In this photograph, back lighting was used to bring out the texture of these helicopter seed pods.

6: Rim Lighting
A particular type of back lighting is rim lighting. Where back lighting will usually create more of a silhouette of your subject, rim lighting illuminates the outer edges of your subject, creating an outline of lighting. This type of lighting is useful to emphasize tiny details such as hairs or rings of frost on a subject that would otherwise go unnoticed.

The rim lighting, especially on the lower portion of this goose, sets the subject apart from the background and gives a nice halo effect.

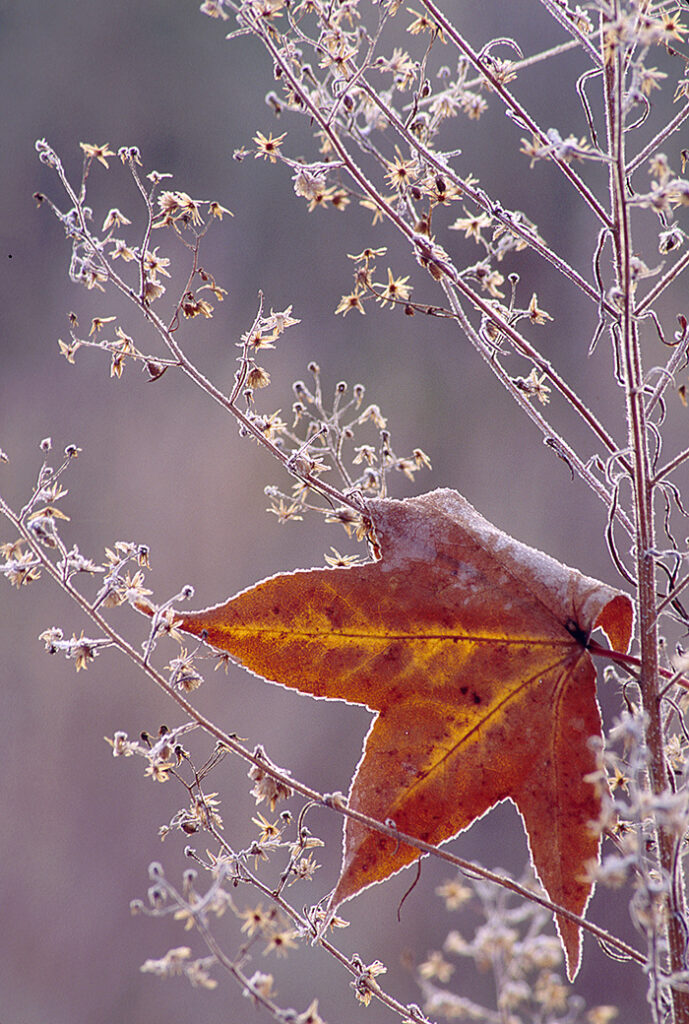
The back / rim lighting of this subject illustrates the frost on the leaf and branches.

7: Diffused Light
The best example of natural diffused light is an overcast day. While not very conducive for landscape photography (unless what you're trying to capture is the mood that the overcast day creates) - it provides the perfect lighting for detail photography, such as close-up or macro photography. Diffused light provides an even light without harsh shadows - great for photographing subjects such as waterfalls, where direct sunlight can create distracting, washed-out highlights and blocked-up shadows.

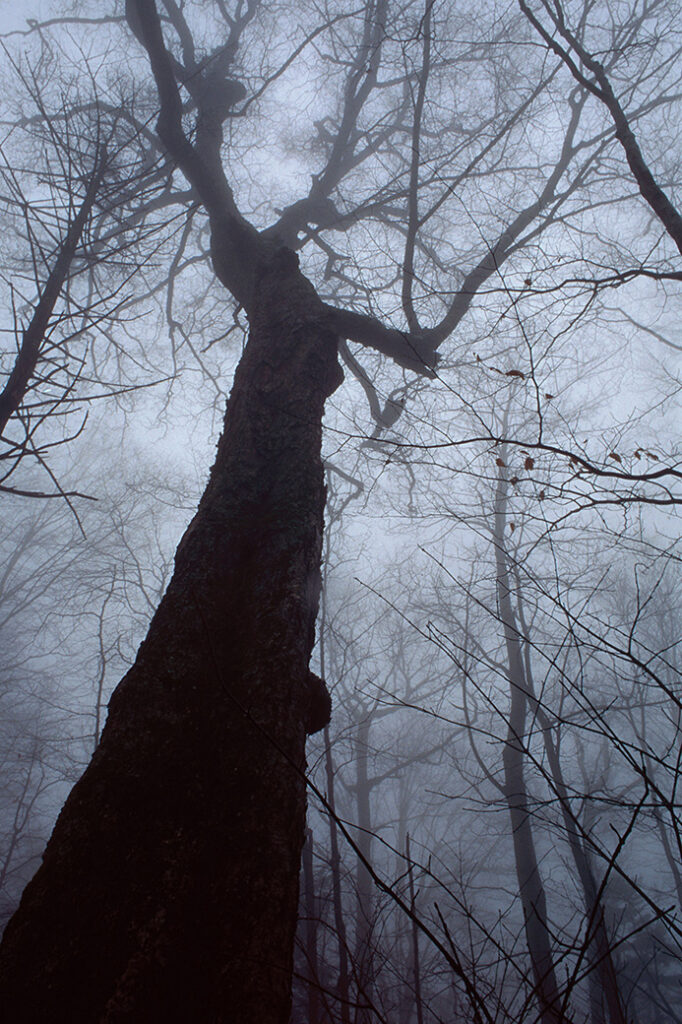
The extremely diffuse light coupled with the ominous tree in the foreground lends a sense of spookiness in this scene.

The lack of harsh shadows and blown-out highlights that diffuse lighting provides saturates colors and creates a calmer image.

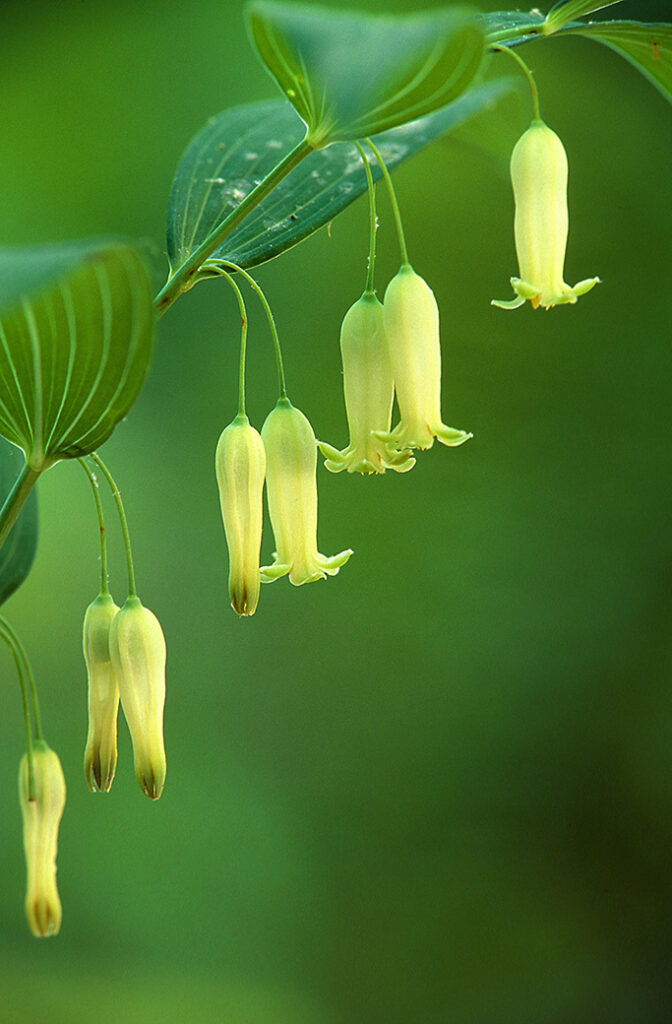
Overcast days with diffused lighting are ideal for this type of subject.

8: Low Light - No Light
Photography in low light environments presents its own set of challenges, the biggest of which is extended exposure times, requiring a firm base for your camera. It is my belief that a tripod should be used whenever possible - but with low light or night photography, it is simply a must. Extended exposures also create exposure problems, such as reciprocity failure with film cameras, or noise with digital cameras. Most modern cameras have a "noise reduction" feature that is useful for this. The end results, however, are well worth the additional challenges.

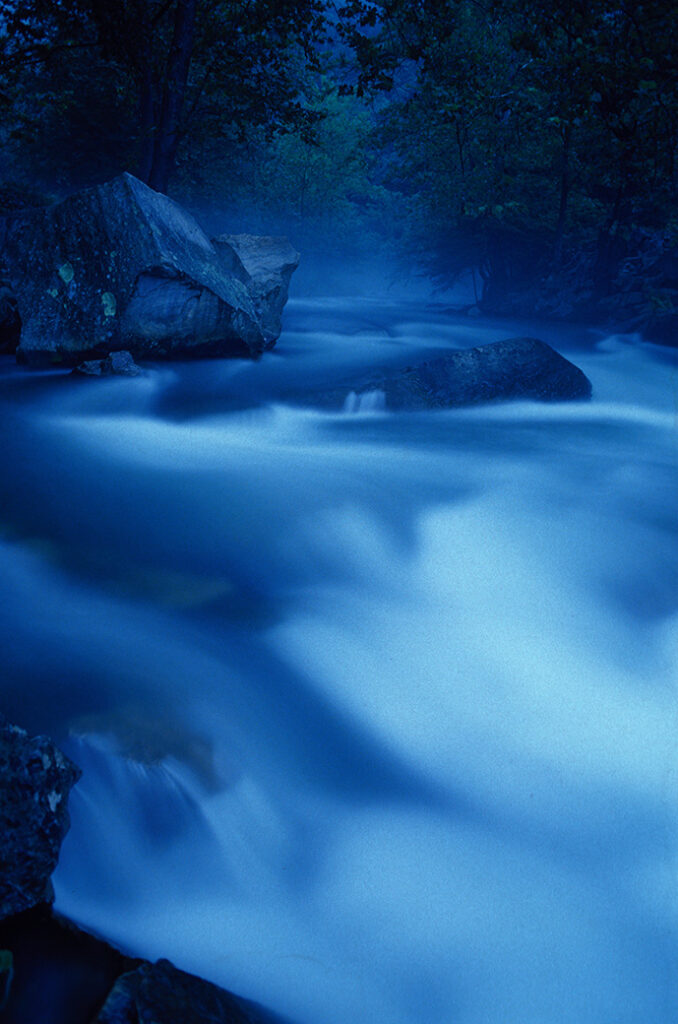
This photo of a stream was taken at night during a full moon at a shutter speed of roughly 2 minutes.

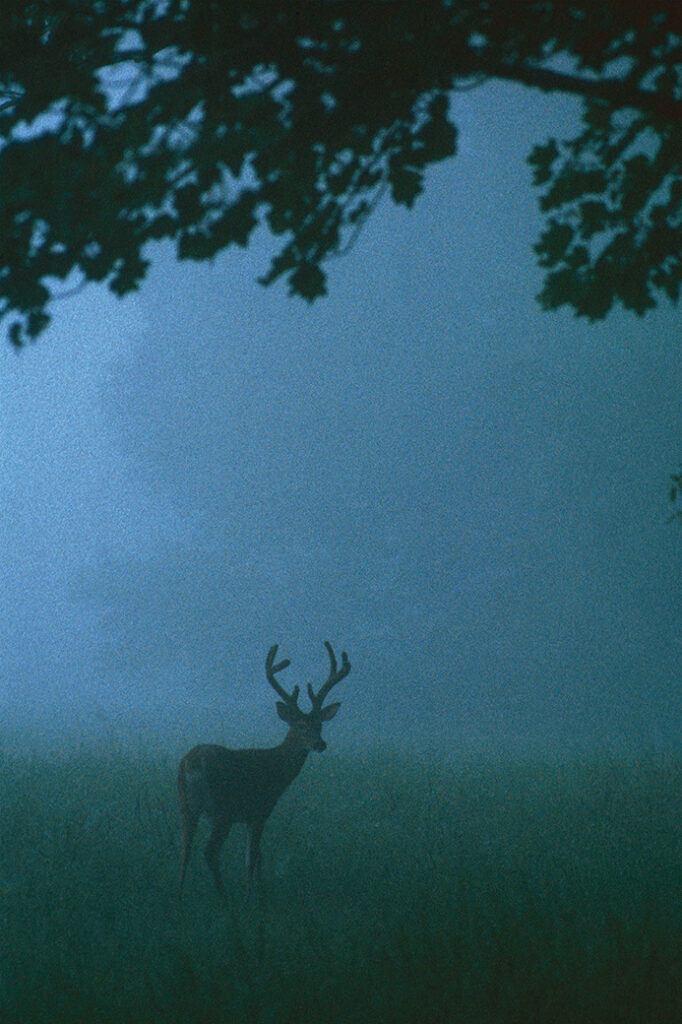
This guy was out in a field well before sunrise. An increased ISO allowed me to use a shutter speed fast enough to shoot him, but created some extra noise.


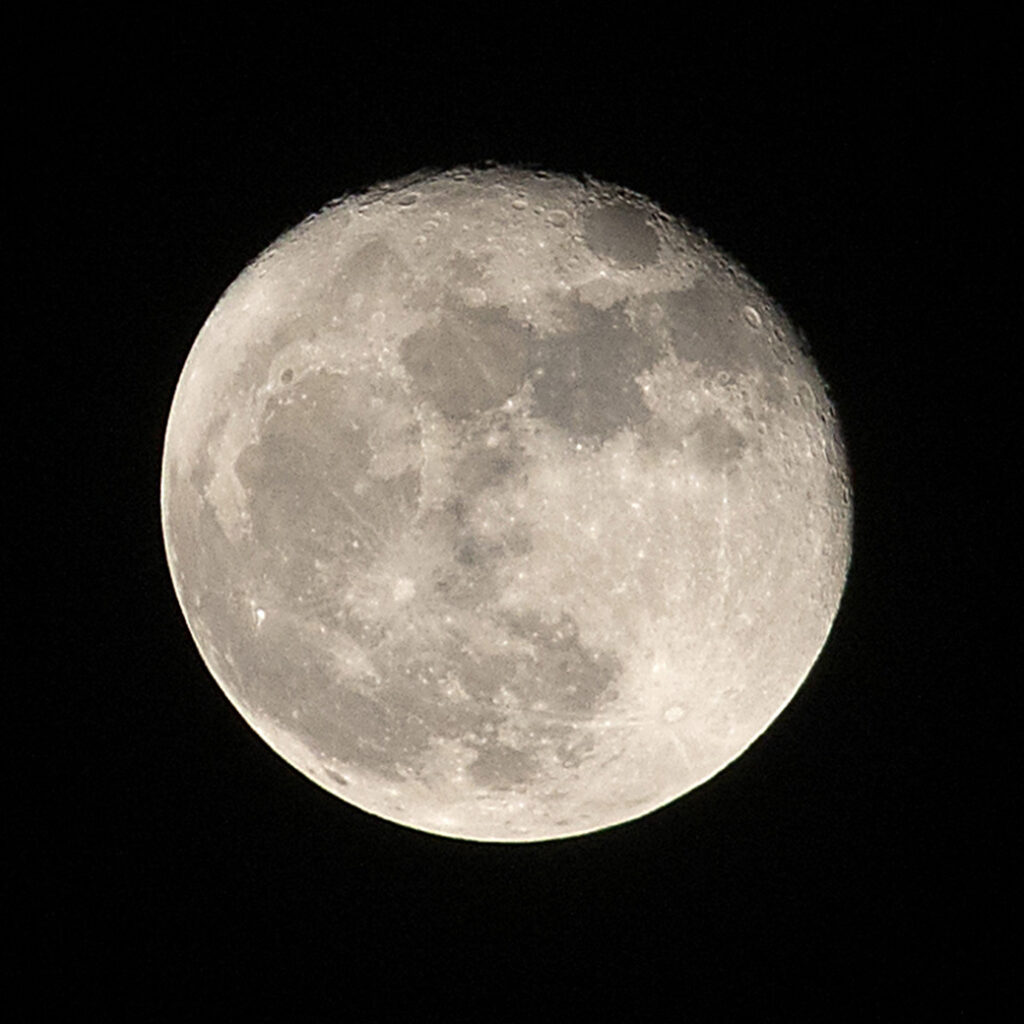
When you think night sky, you probably think "moon" at some point. The correct exposure for the moon, however, may surprise you. If you think about it, the moon is a sunlit object and should be exposed as a sunlit object - SO - this exposure was 1/250 sec @ f8 - ISO-100.

9: Manipulating Existing Light
Although difficult to accomplish with wide landscapes, existing light can be manipulated and/or modified for many subjects. Reflectors, diffusers and "flags" can be used in the field to bounce light onto a subject, or diffuse the light falling on a subject, or completely block light from reaching a subject. Reflectors are used to bounce existing light onto the subject and can include a wide range of items from mirrors to metalic fabric to a simple white card. Keep in mind that the light bouncing off a reflector will take on the characteristics of the reflector itself, in both hardness and color. Diffusers can be used to soften the existing light falling on the subject. Milk plexiglass and translucent fabrics are typical materials used as diffusers. Flags block existing light from falling on the subject and can be made of anything opaque - from your hand to a backpack to a piece of cardboard. These three are often used together - for example, you may want to flag the direct sunlight falling on a flower, while using a reflector to re-direct the light falling on the flower - possibly even through a diffuser.

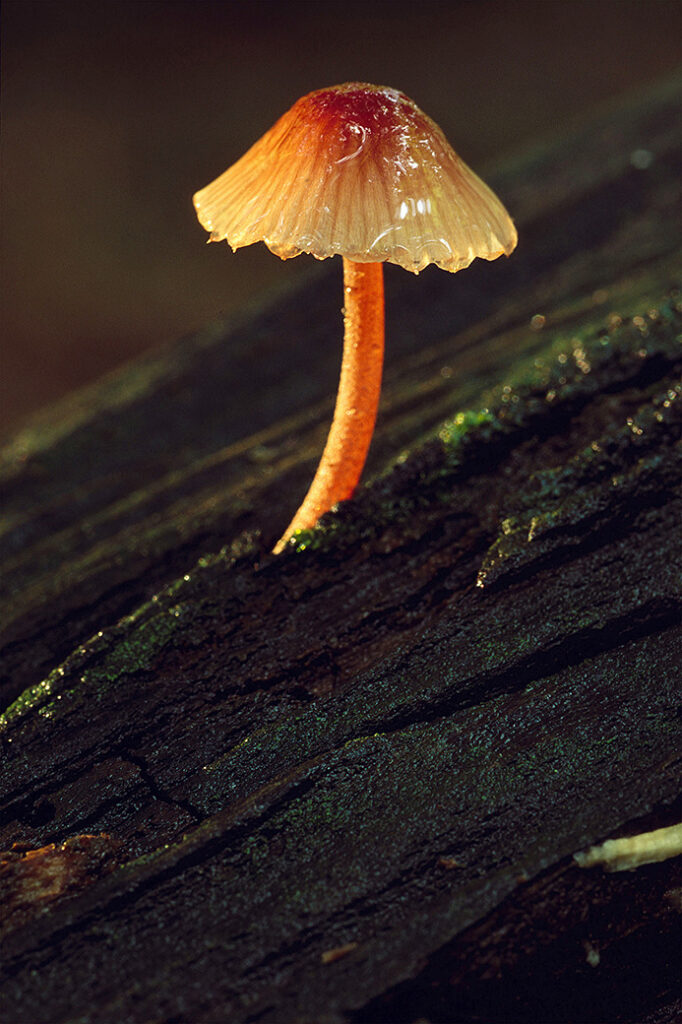
For this photo, I used a flag to block the direct sunlight falling on this mushroom, then used a gold colored reflector to throw some side lighting on it.

I actually liked the direction that the light was coming from in this scene, but it was direct sunlight and very harsh. A diffuser in the form of a photographic umbrella softened the light to allow detail to be recorded.

10: Artificial Lighting
There are situations when the existing light just isn't there, or what is there can't be manipulated. The solution - block out all existing light and use your own light. The most common type of "artificial" photographic lighting (particularly in the field) is electronic flash. "Hot lights", or lights that are constantly on, could be used, but they typically need to be plugged in - not practical for the field, but great for the studio. There are times when even a flashlight can be used to "paint" the scene - but let's concentrate on electronic flash for now. There are lots of pros and cons with flash photography:

Pros:
Compact light source with predictable output
Short light burst will freeze virtually any motion

Cons:
User cannot pre-visualize the lighting effect
Small light source creates hard shadows
Limited range and rapid fall-off of light

When using a flash unit as the sole source of light for a scene, the camera shutter speed no longer has any effect on the exposure (so long as you're using a shutter speed within the flash sync speed of the camera). It is the strength of the light output of the flash combined with a lens aperture that dictates exposure. The neat thing about this is that the duration of most electronic flash's is fast - real fast - in the range of 1/10,000 second. This means that, if your timing is good, you can freeze almost any motion using a flash - think freezing the motion of a hummingbird wing or bumblebee.

OK - so what exactly is the "flash sync speed" of a camera? Most digital SLRs use a focal plane shutter. Focal plane shutter operate by using 2 curtains. When the exposure is started, the first curtain slides out of the way of the sensor, allowing light in. To end the exposure, the second curtain slides over the sensor to block the light. Both curtains are then repositioned to repeat this process for the next exposure. At high shutter speeds, the second curtain will start to close before the first curtain has traveled completely open, creating a slit of light traveling across the sensor to create the exposure. For an electronic flash to work correctly, the entire sensor has to be exposed - meaning that the first curtain is completely open, and the second curtain has not started to close. The highest shutter speed your particular camera has that meets this requirement is your camera's flash sync speed.

Flash units come in a wide range of sizes and powers, but the vast majority of them are limited in range - even a powerful electronic flash will only illuminate within 50 feet or so, and the amount of light striking objects 10 feet away is considerably stronger than objects 40 feet away. A flash's power is determined by it's "guide number" (GN). Manual exposures can be calculated by using this guide number. For example, if my flash has a GN of 40ft, and my subject is 10 feet away, I can divide the guide number by the distance (40/10) and come up with 4 - this is the aperture that will give a correct exposure. As you can tell by using this formula, objects 20 feet away would require an aperture of f2 - that is a loss of light equivalent to roughly 2 stops in 10 feet! The moral of this story - electronic flash can be useful, but be aware of their limitations. For subjects within roughly the same plane, they're great - for scenes with a lot of depth, not so much.

Electoinic flash can be used as the primary light source for the scene, or can be used as a fill light to "fill-in" some light in shadows in a scene with existing light, or can be used as the main source of light coupled with a shutter speed that exposes background elements. Combining flash with existing light, of course, means that the flash is no longer the sole source of light, and the shutter speed comes back into the equation for the correct exposure, and some calculations have to be made to combine the flash with that existing light. For example, I have a flower I want to light with a flash, but I want the background, lit with existing light, to be visible. Using the flash mentioned above with a GN of 40, I know my exposure for this flash with a subject 5 feet away is (shutter speed within flash sync speed) @ f8 - this is the exposure for the flower - but what about the background? Meter the background to determine the correct shutter speed to expose that background using f8 as your aperture - let's just say that your exposure for the background would be 1/15 sec @ f8. 1/15 sec - This is the shutter speed to use WITH the flash to balance the foreground lit with the flash and the background illuminated with existing light.

A final note on electronic flash - form the most part, a flash will produce hard shadows. This is because the size of the light source is relatively small (maybe 2" x 1"). There is one situation where this 2" x 1" light source becomes a very soft light source, and that's extreme close-up or macro photography. We will be going into LOTS of detail about macro photography in the near future, but consider using a flash with your camera mere inches away from your subject, shooting an area of about 2" x 1". The size of your flash's light source is now quite large compared to your subject and becomes a large lightbox providing a nice, soft light for your subject.


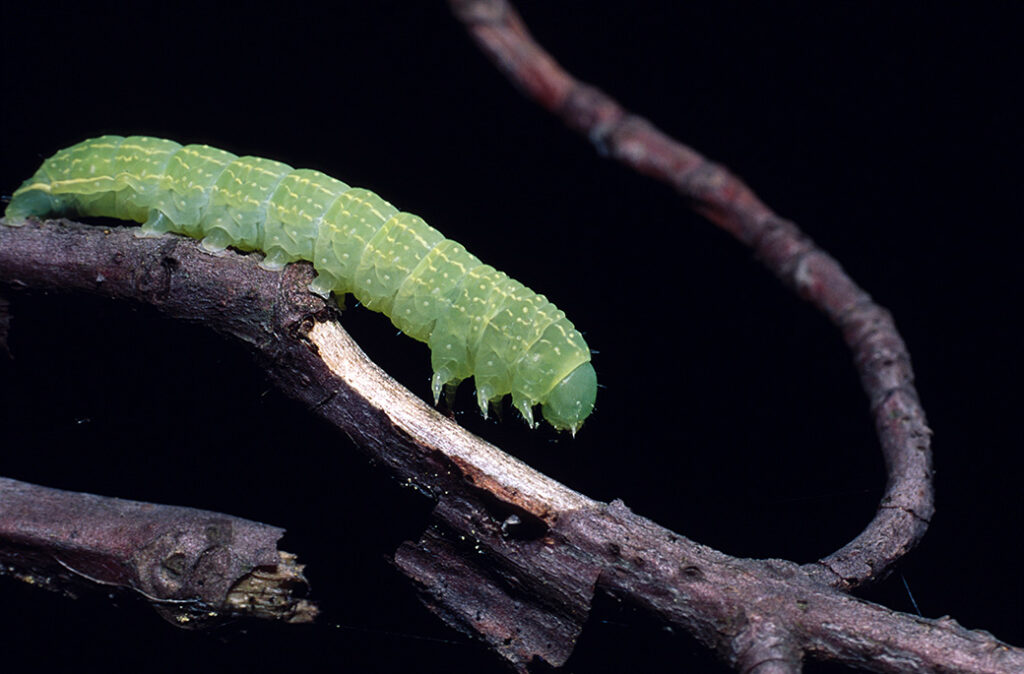
This was taken using a flash as the light source. The light falloff is so great that the background received no light at all, reproducing as black.

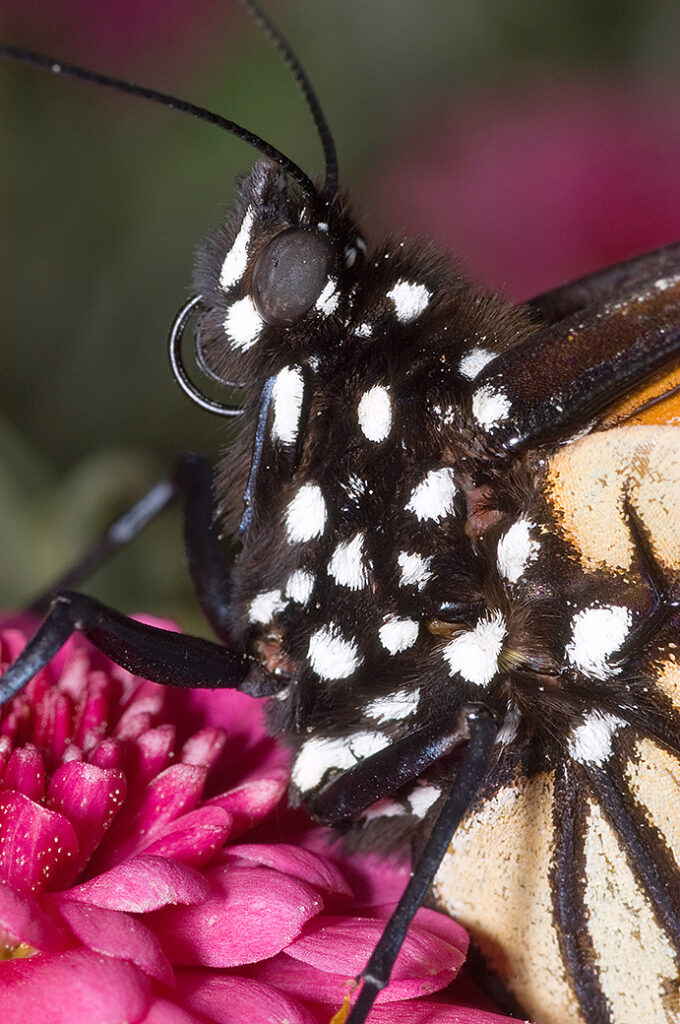
Another close-up shot with a flash, but with this photo, I used a slower shutter speed to prevent the background fro going black.

Up next - some things to keep an eye out for and some ideas for subjects